Adobe Sign Quickstart
This guide provides a detailed walkthrough of connecting Remote Action to Adobe Sign.
Note
Adobe Sign is supported in Remote Action version 5.1 and newer.
The overall process that needs to be completed to connect Adobe Sign to the Remote Action service is:
- Create an account.
- Create a new API application.
- Perform the initial configuration in Sage.
- Complete the OAuth workflow.
Creating an Account
Remote Actions will connect to the User’s Adobe sign account. The user must create an account before a connection can be established.
For demonstration and testing, a free developer account can be used. All agreements created using a demo account have a watermark applied and cannot be used in production.
To create a new developer account, visit the Adobe Sign Developer Account Sign-Up.
Creating the API Application
An API Application allows a service, like Remote Actions, to obtain a token used to act on a user’s behalf. The application must be created and authorized by the user to obtain tokens. The authorization can be revoked at any time.
To create an API application, sign in to Adobe Sign and take the following steps:
Once you’ve signed in, you will be redirected to your dashboard. The URL will be in the form
https://secure.<shard>.adobesign.com/.... The shard will be a short code likena1,eu2, orap3. Take note of:- Shard:

The shard for this account is na4.
- In the navigation column on the left of the screen, expand Adobe Sign API and open API Applications.
- In the API Applications page, click the + icon to create a new application.
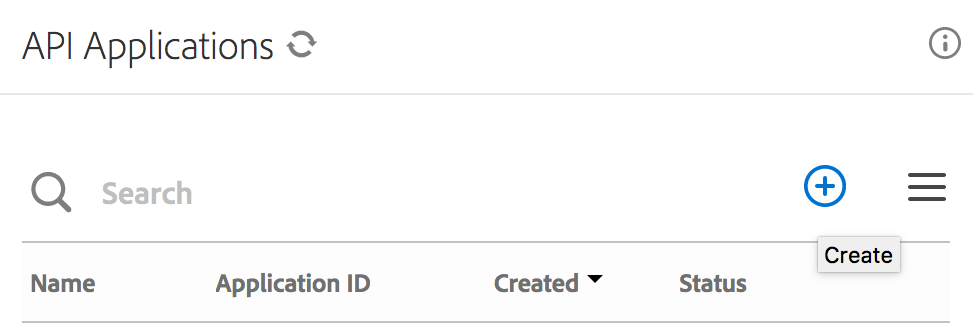
Click the + icon to create a new application.
Create a new CUSTOMER API application.
- Name: remote-action-service-<COMPANY>
- Description: Remote Action - Intergate with Sage 300 - <COMPANY>
- Domain: CUSTOMER
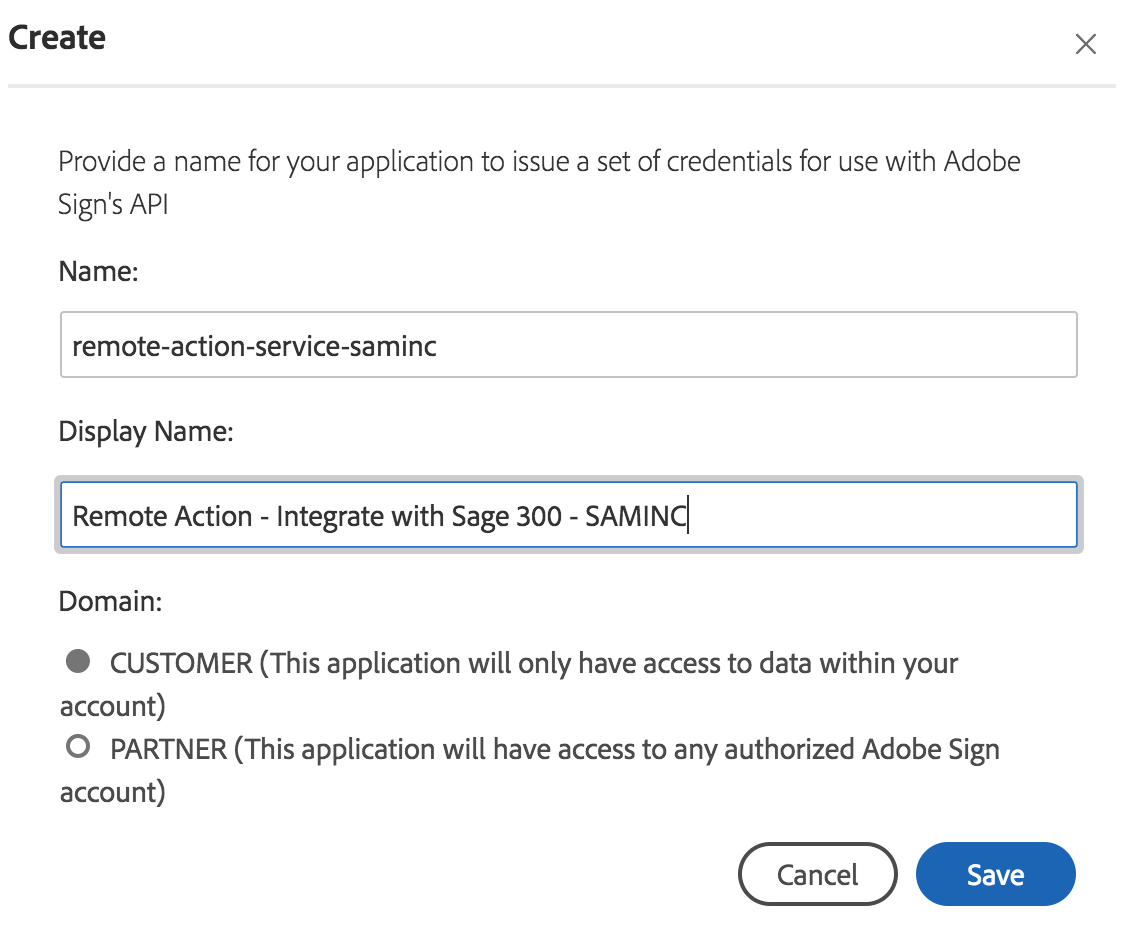
Define a new CUSTOMER API application.
- Once the application has been created, highlight it and select Configure OAuth.
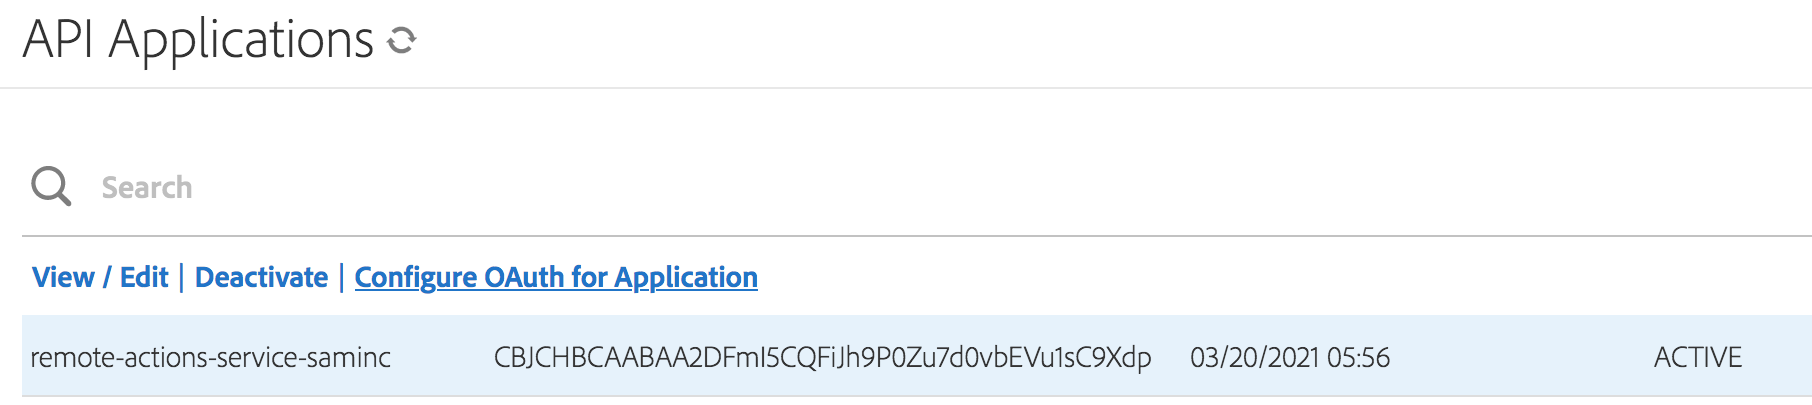
Highlight the new application to reveal Configure OAuth link.
Configure OAuth for the application. Take note of:
- Client ID:
- Client Secret:
Set the following values:
- Redirect URI: https://poplars.dev/adobe-sign-activate.html
- Enable the following OAuth Scopes with the modifier
self:- user_read
- agreement_read
- agreement_write
- agreement_send
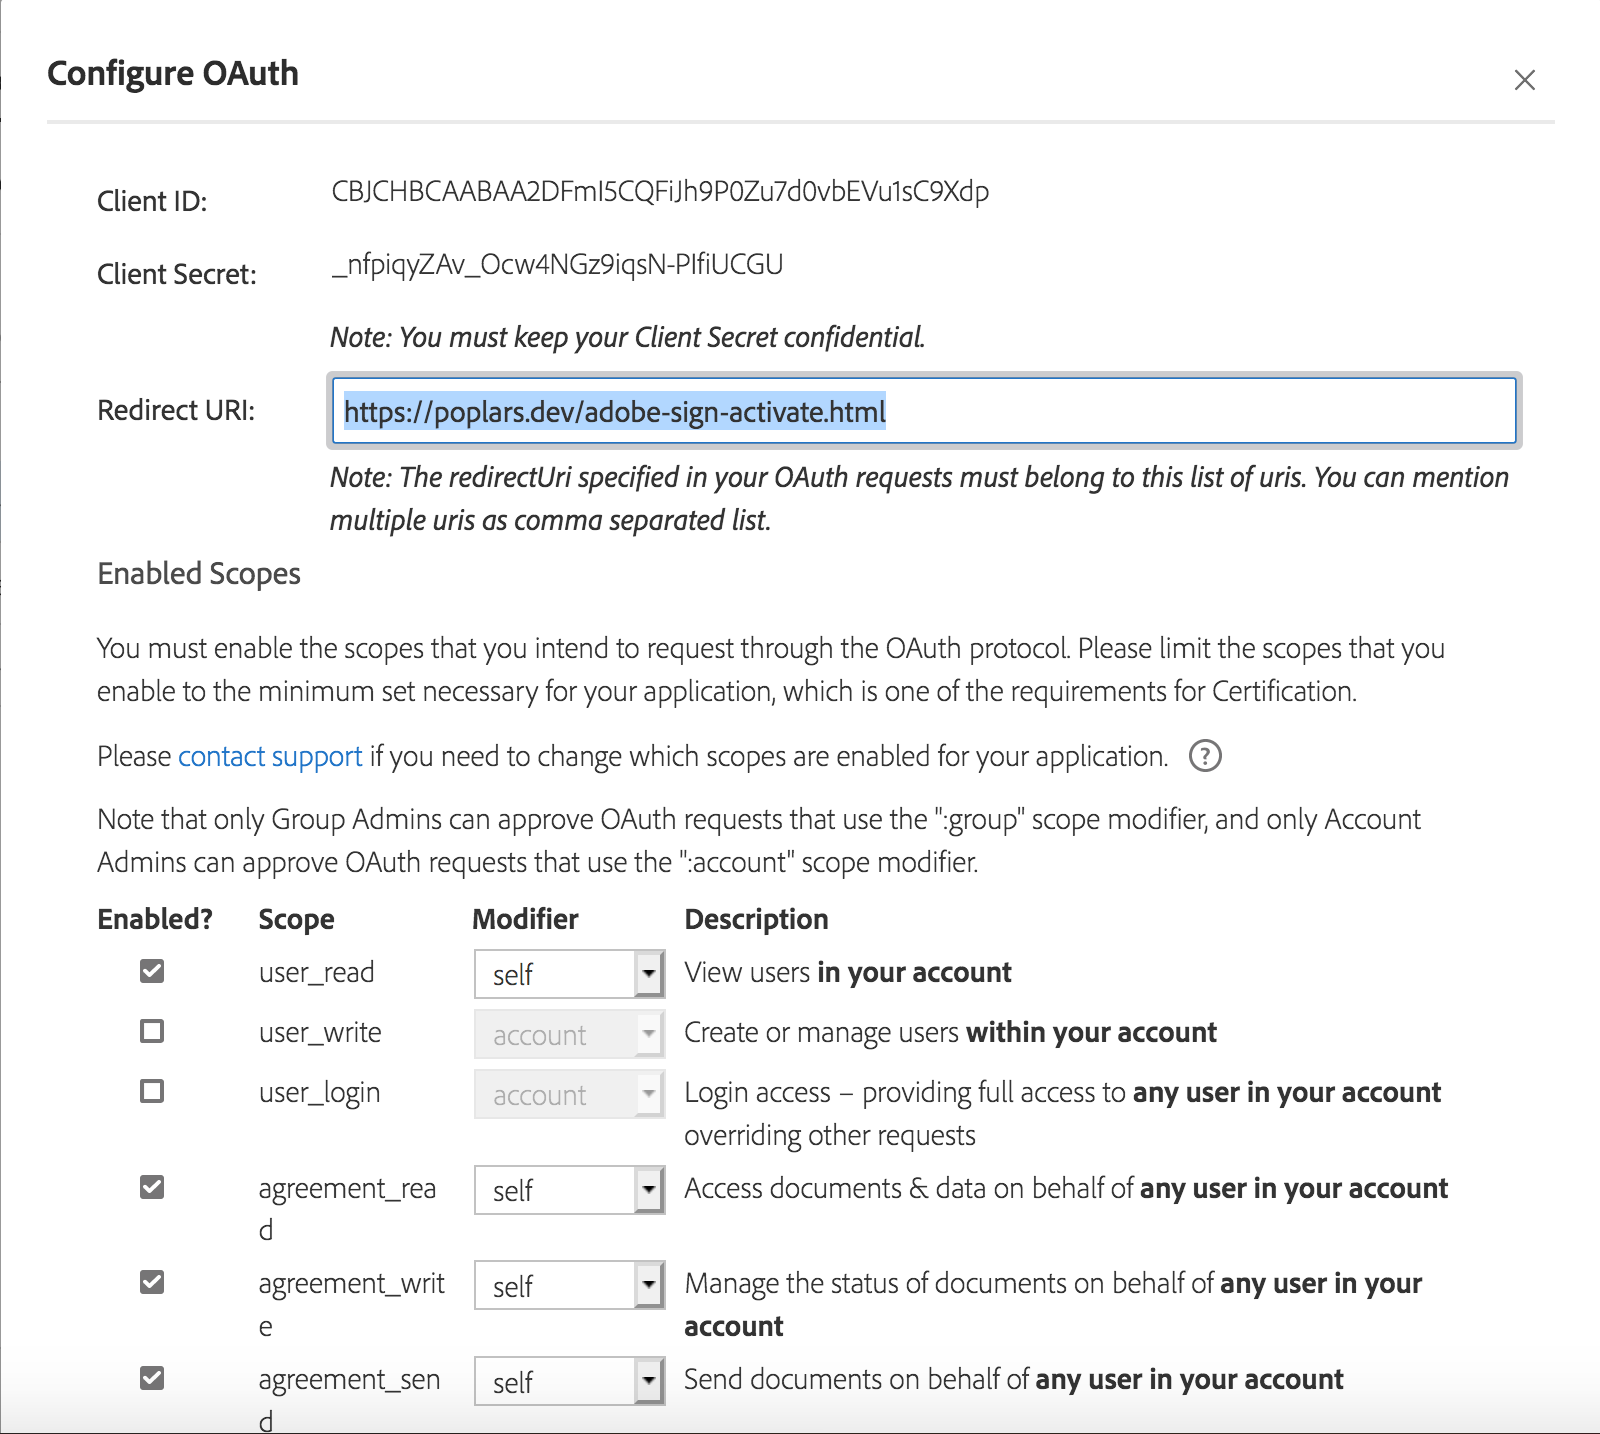
Record the Client ID and Client Secret, set the scopes for self.
- In Sage, start Extender –> Remote Action –> Setup –> Adobe Sign Connect.
Open the Adobe Sign Connect utility to start connecting Remote Action to your Adobe Sign account.
- Fill in the Shard, Client ID, and Client Secret that you noted in the previous steps. Once filled in, the Authorize button will be enabled.
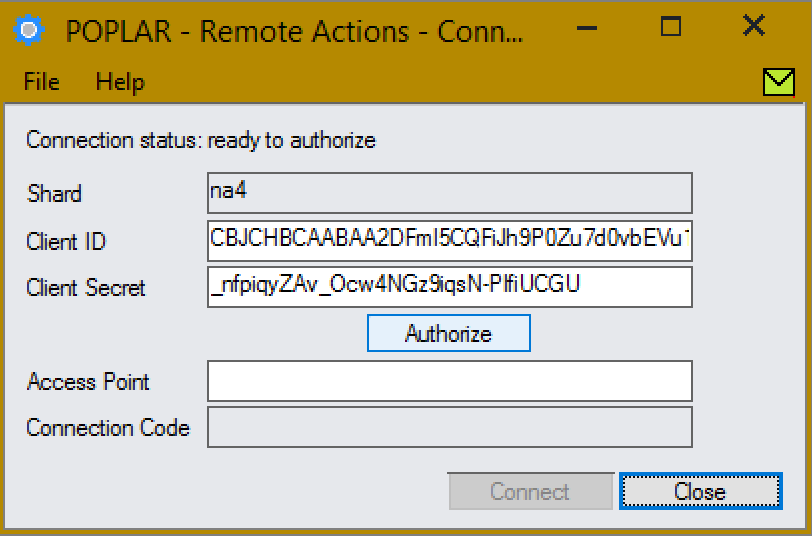
Input the Shard, Client ID, and Client Secret recorded in the previous steps.
Click the Authorize button. A web browser will open, prompt you to sign in and authorize the application to connect to Adobe Sign on your behalf.
After authorizing the application, you will be redirected to the Poplar Development Adobe Sign Connection Confirmation page. This page will display the values required to complete the connection. Take note of:
- Access Point:
- Connection Code:
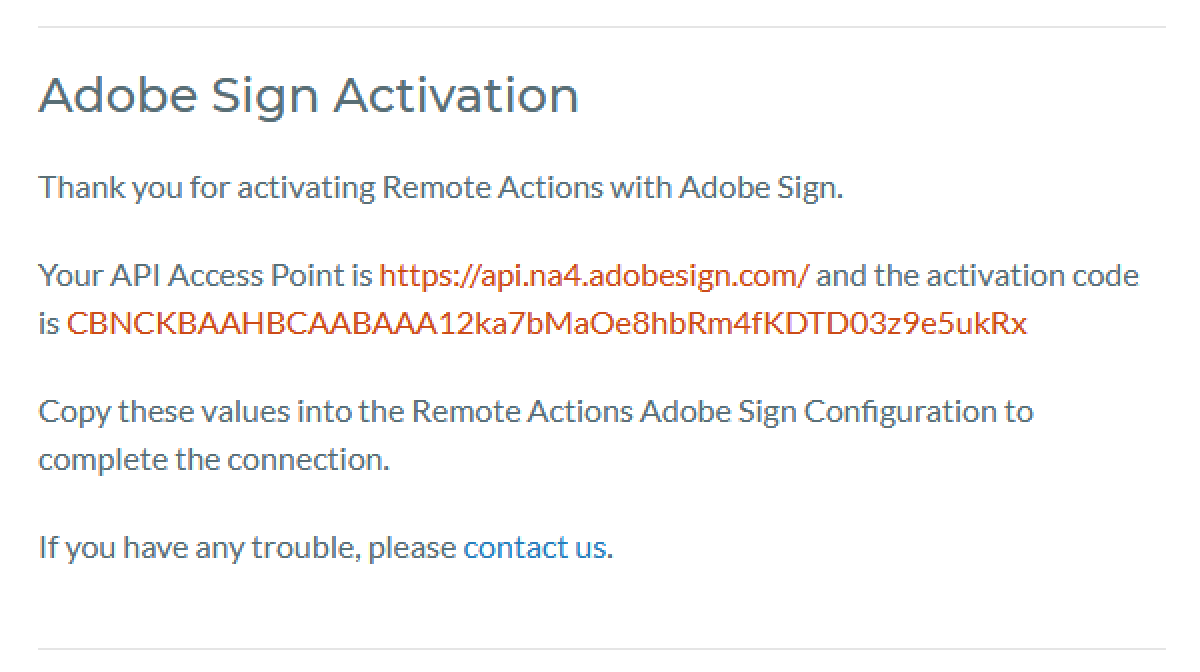
The Poplar Development Adobe Sign Connection Confirmation page displays the Connection Code and API Access point required to complete the connection.
- Input the Access Point and Connection Code into the Adobe Sign Connect screen in Sage. Complete the connection by clicking on the Connect button.
Note
If the access point URL ends with a / it will automatically
be removed.
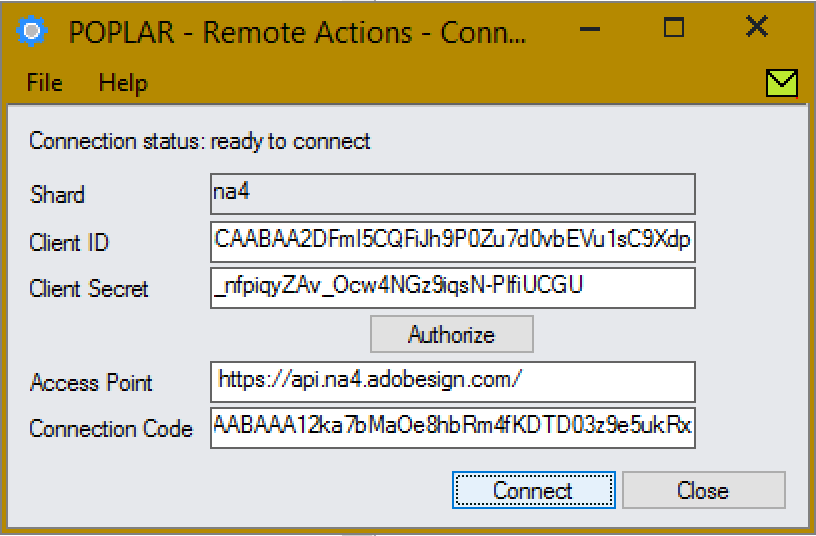
When you click Connect, the process will be completed and a persistent connection established.
- Once connected, the configuration is complete.

When you click Connect, the process will be completed and a persistent connection established.